Pinhole
Photography
...using a 35mm camera with body-cap
pinhole
 |
Exposure: about 4 seconds, Velvia
colour slide film ISO100
|
...using an Oval tin
|
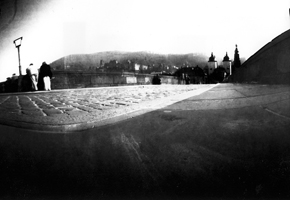
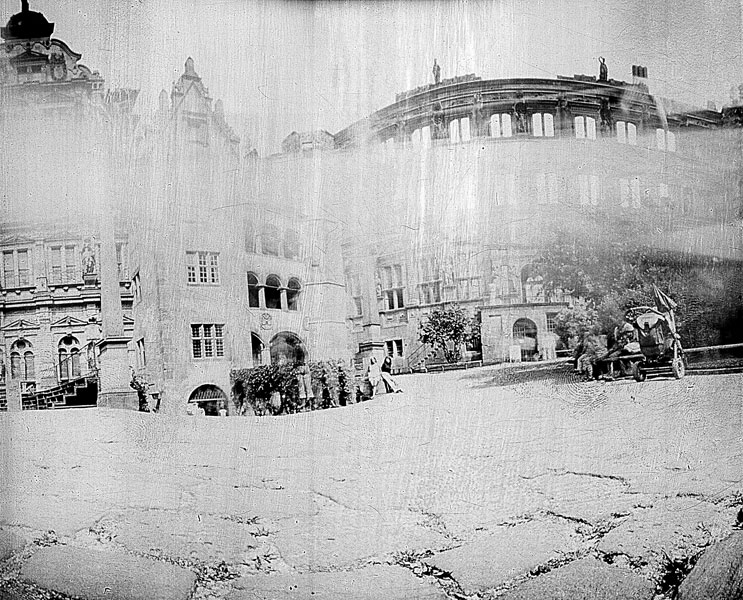
"Die Alte
Brücke" (The Old Bridge), Heidelberg, 2006
The famous "Heidelberger Schloß" (castle) is in the
background.
Exposure: about 20 seconds, scanned contact print.
Due to the long exposure, the many people strolling over
the bridge are not visible, making the bridge look almost
deserted |

|
Rathaus
(Town Hall), Heidelberg, 2006
Exposure: about 20 seconds, scanned contact print.
|
|
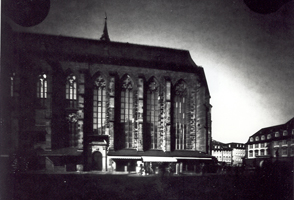
Heiliggeistkirche
(Church of the Holy Spirit), Heidelberg, 2006
Exposure: about 20 seconds, scanned postive print. |
 |
|
Through the window at the Uni., 2006
Exposure: about 30 seconds, scanned paper negative,
inverted in Photoshop.
|
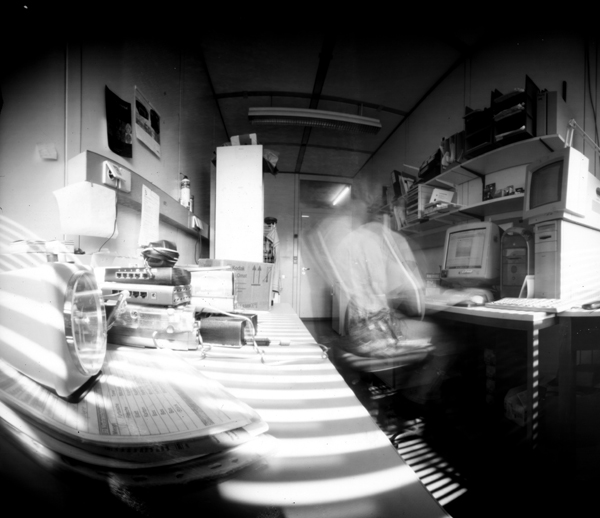 |
My workplace, 2006
Exposure: about 30 minutes, scanned
paper negative, inverted in Photoshop. |
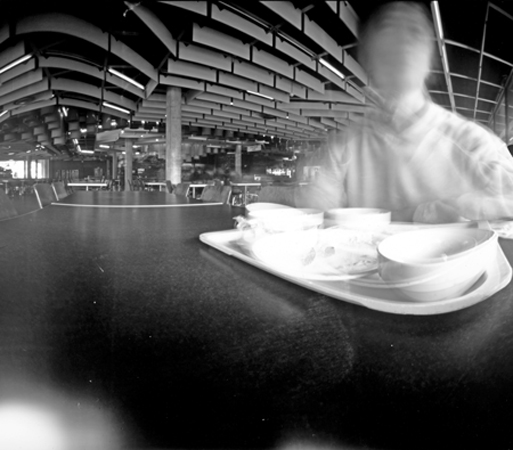 |
Lunchtime,
Mensa, Uni. Heidelberg, 2006
Exposure: about 20 minutes, scanned
paper negative, inverted in Photoshop. |
|
 |
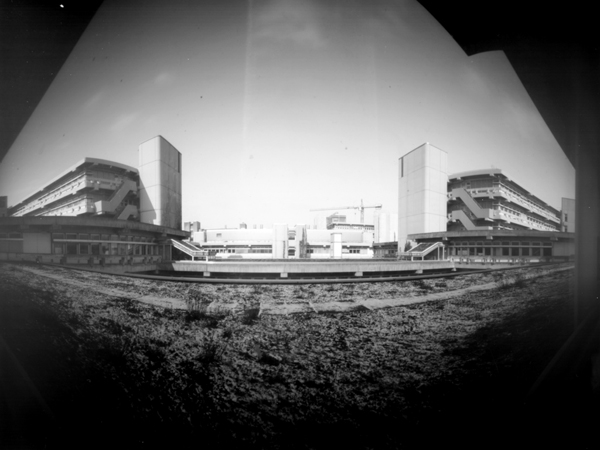
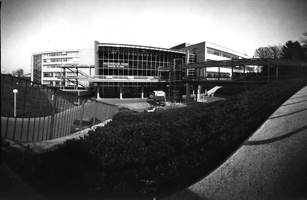
Klinik, Uni.
Heidelberg,
2006
Exposure: about 20 seconds, paper
negative scanned & inverted. |
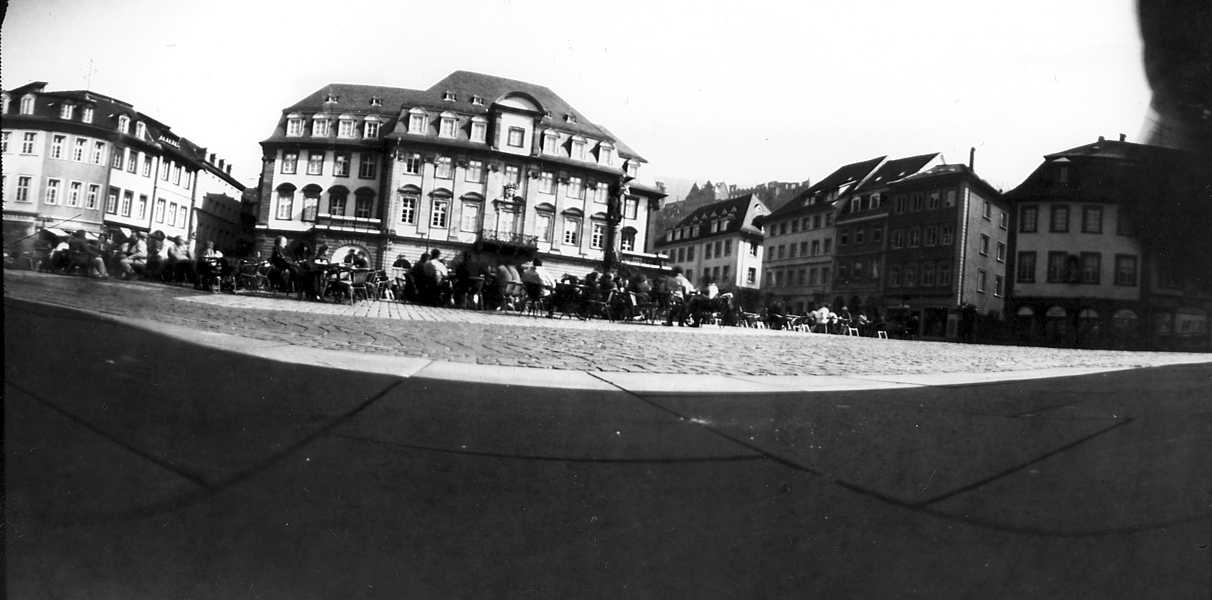
View from the café terrace (2007, me on the
right)
Exposure: 40 seconds, paper negative scanned &
inverted. |
 |
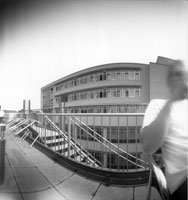
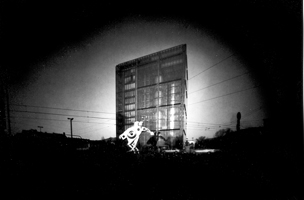
Neurobiology,
Uni. Heidelberg,
2007
Exposure: 20 seconds, paper negative scanned &
inverted.
|

|
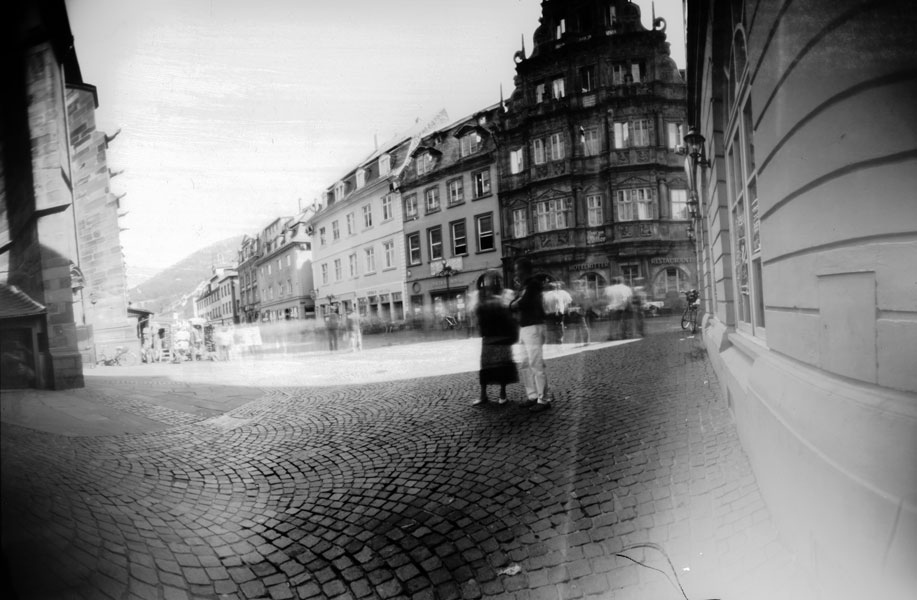
The "Hotel Ritter", Hauptstraße, Heidelberg.
Exposure: 2 minutes, paper negative scanned &
inverted.
Due to the long exposure, the large group of Japanese
tourists who stopped to take pictures, is
not visible.
|
|
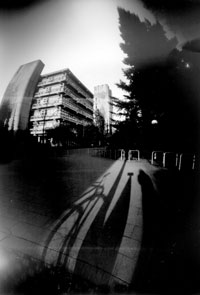
Neurobiology, late
afternoon
Exposure: 40 seconds, paper negative scanned &
inverted.
The shadow of the camera postioned horizontally at the
end of a metal fence is visible near the middle of the
picture.
|
|
|
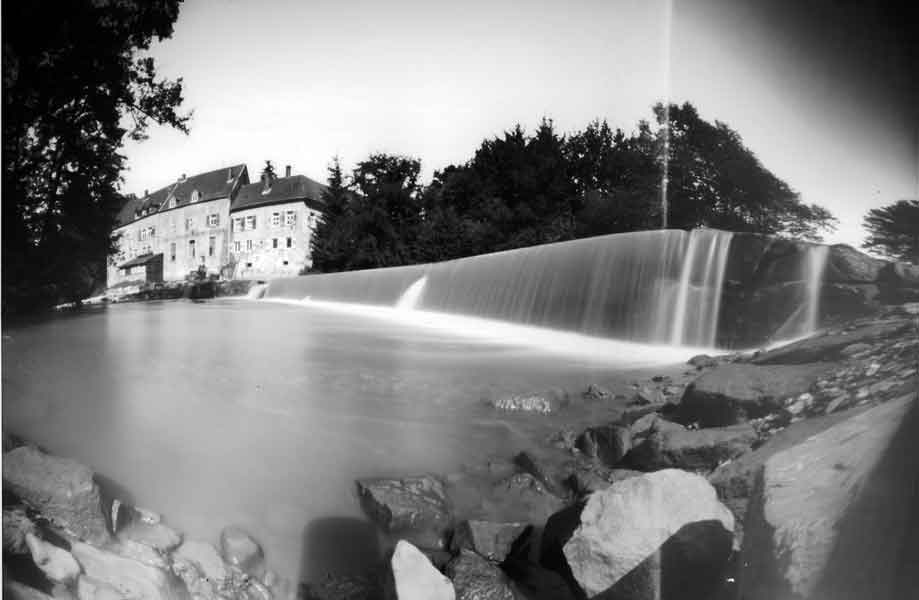
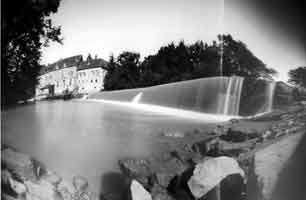
Water powerstation near Neckargemünd
Exposure: 40 seconds, paper negative scanned
& inverted.
|
|
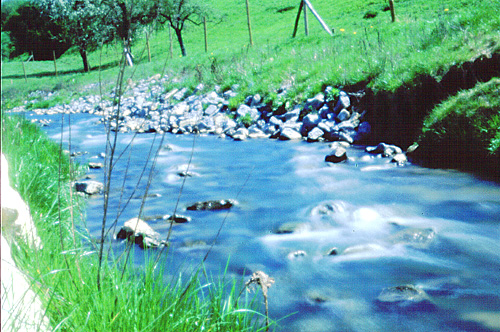
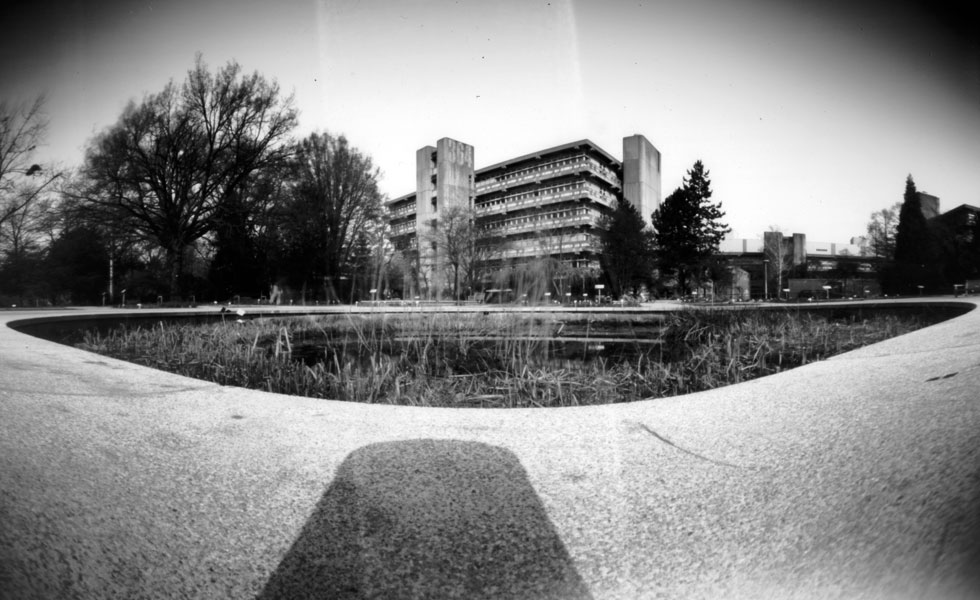
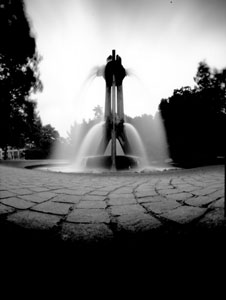
Fountain, Adenauerplatz, Heidelberg
Exposure: 40 seconds, paper negative scanned &
inverted.
|
|
Gonca and Güney at the Heidelberger Schloß
(castle), August 2008
Exposure: 80 seconds, paper negative scanned &
inverted.
|

Heidelberg's Old Bridge and Castle - my submission for World
Pinhole Day 2021
Pinhole Size Calculator
MrPinhole.com |
|
Inches |
mm |
| Focal Length |
3.54 |
90 |
| Diameter |
0.016 |
0.4 |
| f stop |
225 |
| Image Circle |
6.8 |
173 |
...using a Flat Tin
 |
Through the
window at the Uni.
Exposure: about 20 minutes, scanned
paper negative, inverted with Photoshop. |
|
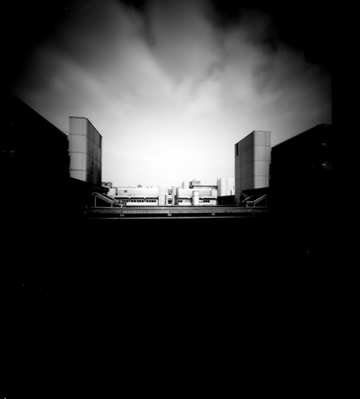
Print-Media-Academy, Heidelberg
The statue is of a sprinting horse.
Exposure: about 20 seconds, scanned postive print.
|
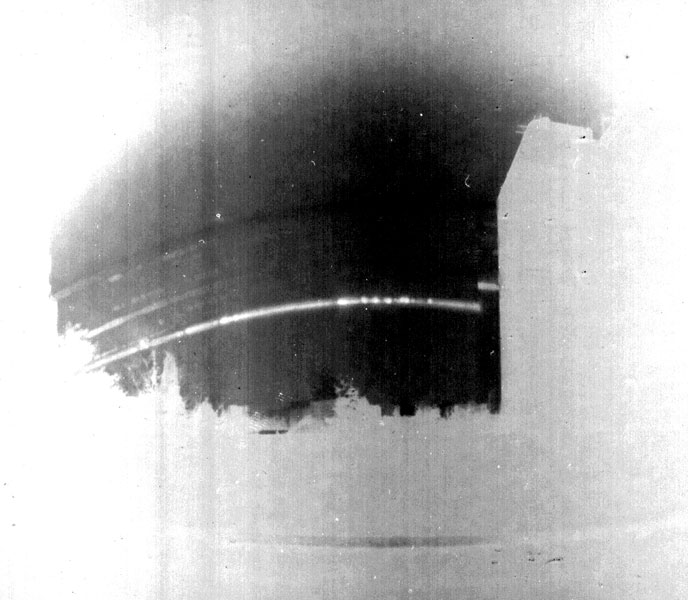
Sun picture
|
3-month exposure, winter 2009/2010
|
| A grey winter unfortunatelly. Wooden box
camera, proportionately made to hold the 13x18 cm. paper
in a half-rolled position. Fixed un-developed, scanned,
inverted and enhanced. Unfortunately the fixing removed
more of the image than expected. |
Pinhole Size Calculator
MrPinhole.com |
|
Inches |
mm |
| Focal Length |
2.56 |
65 |
| Diameter |
0.013 |
0.34 |
| f stop |
191 |
| Image Circle |
4.91 |
125 |
Exposure guide:
60% of that for oval tin
Photo material:
Ilford Multigrade* paper, pre-flashed 0.4 seconds**, developed in
Ilford 1250 machine developer
*Slightly better green sensitivity compared to fixed-gradation
papers, giving lighter leaves & grass.
**Pre-flashing increases the sensitivity and lowers the contrast
of the paper and improves shadow detail. Using Ilford Multigrade
IV with a pre-flash (0.3 seconds, 10W lamp pointing up 2 meters
under the ceiling, paper 1m under the lamp). The correct pre-flash
exposure time is determined by placing a flat object on the paper
and flashing it with a weak white light. The correct exposure is
the longest time where the shape of the object is not visible on
the developed paper.
Positive print:
Face-to-face contact with Ilford Multigrade IV Deluxe photographic
paper.
Contact print: enlarger 1m above baseboard; 6 seconds
20.3.2007
I now have a Gossen Sixtar light meter from eBay :-)
I made a few tests from the window and then made a "proper" picture:
Neurobiology, Uni. Heidelberg,
2007 above
The settings are: ASA/ISO 6, read the exposure time against f/45 and multiply by 10. This
is for outdoor exposures - indoor exposures might require longer
times, due to the lack of UV (it's absorbed by the glass in the
window) but I haven't tested this.
As our Ilford 1250 developing machine is no longer used
<sniff>, I'm developing my pictures in a Kodak X-ray film
developing machine.
30.10.2009
Development through the machine was never optimal as there were
often roller marks along the print, so now I'm going to develop the
prints in the tray using the chemicals from the x-ray machine for
convenience.
First test: developing a strip of photo paper in room light (as the
paper has to be totally exposed) for 10, 20, 40, 80 and 160 seconds,
20 seconds was the shortest time that gave maximum black; longer
development times show now increase in density. 20 seconds is much
too short to get an even development, so my guess is
100 seconds diluted 1:5 at ca. 20°C
The developer used is Focus, produced by Röntgen Bender here in
Germany; Kodak X-Omat would be an alternative.
6.11.2009
Further tests:
Development: 2 minutes.
"Focus" X-ray developer, stock solution, diluted 1+5 @ 20°C
Preflash: 0.3 seconds. The longest flash with no visible effect.
Safelamp, filter removed, pointing at the ceiling. Paper lying on
top of the developing machine.
25.3.2010 -
my birthday :-)
Opened the camera of a long exposure I'd been making: b/w paper
exposed in the direction of the Sun over a 3-month period (December
2009 - February 2010). As the exposure was so long, it wasn't
necessary to develop the image, as it was already visible on the
paper. All it needed was scanning. Unfortunately I made a mistake: I
fixed it, thinking the image consisted of silver particles and it
would protect the image from darkening but the fixing removed some
of the image. The image was scanned, inverted and greatly enhanced
and can be seen above. There weren't many sunny days unfortunately,
but the technique works at least.
November 2019
After a looong break, I'm taking pinhole photographs again.
Not happy with the cumbersome one-shot technique described above, I
now use
- Sony 'a5000 ILCE5000' digital camera body
- Thingyfy 'Pinhole Pro-S' pinhole 'lens'
- SONY 'Imaging Edge Mobile' app
- 'Light Meter - Free' app
- HAMA table-top tripod
- USB lockable cable release
The SONY a5000 is a mirrorless, viewfinderless digital
camera.
Positives:
- tiltable screen
- USB
- WiFi
- HDR
The shutter settings I use are Aperture Priority and Manual/Bulb.
For Bulb I have a manual cable release that plugs into the USB
connection. The WiFi provides a connection to the SONY Imaging Edge
Mobile app. The 2-second delay is useful when triggering the shutter
by hand. 16:9 format for nice wide/tall shots.
Negatives:
- The mirror/shutter sound-effect which cannot be switched off.
Mildly annoying when making multiple HDR exposures.
- A high minimum ISO of 100 requiring ND filters for long
exposures. I have ND2 and ND8.
- The tiltable screen is hinged on the top edge, so viewing the
image in the Imaging Edge Mobile app is useful when taking
vertical low-level shots
The Thingyfy Pinhole Pro-S has a 0.14mm pinhole positioned
at 11mm from the camera chip - exactly as calculated as the optimum
pinhole size by Mr. Pinhole. According to the specifications
it has a 120° field of view.
Negative: I suspect the shiny surface of the cone shape of the
'lens' directs stray light into the pinhole. Red fringing on the
short sides of the image.
The SONY 'Imaging Edge Mobile' app allows basic control over
the camera, namely
- image display
- exposure time display
- ISO display
- shutter release delay control
- shutter release control
- instant photo upload to the mobile phone
Manual exposure calculation is made by using the 'Light Meter -
Free' app for Android by WBPhoto. For some reason, calculated
exposures longer than 20 seconds require exposure correction of +1
stop; over 1 minute require +3-stop correction.
The HAMA table-top tripod does a good job of holding
the camera steady on uneven surfaces. It has a ball head for
adjusting the position of the camera. Vertical shots are a bit
fiddly as the camera hangs between two of the legs, not allowing
much room for tipping the camera upwards when taking low-level
shots. The tripod screw mount is under the lens, but the main weight
from the batteries is at the other end of the camera - one tripod
leg has to be under the batteries or the tripod will topple over.
The USB lockable cable release is about 1 meter long. The
sliding lock is useful for very long exposures.